You want tattoo practice that builds skill without risking someone’s skin, so pick designs that teach line control, shading, and composition in small, repeatable pieces. Start with simple single-line motifs, small blackwork shapes, and gradient shading exercises on practice skin or fruit — they train the core motor skills you’ll use on real clients.
As you progress, move to slightly larger pieces that combine lettering, dotwork, and basic color fills, and place them on practice areas that mimic real anatomy (curves, flat planes, and stretchable surfaces). This article will guide you through choosing designs, the best body locations to simulate, common technique drills, mistakes to avoid, and how to turn practice pieces into a portfolio that helps you book real work.
Choosing the Right Practice Tattoo Designs
Pick designs that build core skills: steady lines, consistent spacing, even shading, and clean lettering. Focus on repeatable exercises you can measure, such as line length, dot spacing, and letter height.
Recommended Products

Professional-Grade Realism:Professional Grade 1mm Fake Skin with realistic dermis texture, certified by artists for true needle feedback and ink absorption. This synthetic skin delivers an authentic tattooing experience, making it perfect for beginners to practice safely and build confidence.

📦 [10Pcs Individually Sealed] 10 sheets of premium tattoo practice skins (8"x6" / 1.0mm thick), each vacuum-sealed for hygiene. Double-sided blank fake skin maximizes usage – wipe & reuse for multiple techniques.

💙PACKAGE AND SIZE- Urknall tattoo practice skin set includes 10pcs of thick tattoo skins, each individually packaged for clean and convenience. With a thickness of 3mm, these tattoo skins measure 7.48" long by 5.62" wide, providing ample space for your tattooing endeavors.
Simple Shapes and Lines
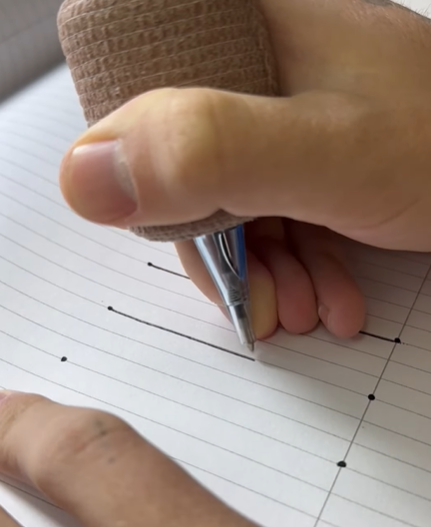
Start with straight lines, curves, circles, and dots to train hand steadiness and speed control. Draw parallel lines of varying lengths and spacing; aim for even width and no wobble. Practice single-needle dots in grids to learn machine dwell time and ink saturation.
Use concentric circles and ellipses to test needle angle and wrist rotation. Repeat the same shape until you can reproduce identical size and pressure three times in a row. Track improvements by photographing each attempt under the same light and distance.
Prioritize consistency over complexity. These basics translate directly to clean outlines and controlled shading on real skin.
Geometric Patterns
Work on tessellations, repeating triangles, hex grids, and mazes to develop symmetry, spacing, and precision. Use a stencil or freehand a simple grid first; then remove guides as you gain confidence in proportional spacing.
Practice connecting points cleanly and maintaining line intersections without ink blowout or overlapping. Focus on steady needle depth across the pattern so line weight remains uniform. Add simple dotwork fills to learn smooth gradients and density control.
Geometric pieces teach you sectioning and pacing for larger compositions, which helps when you scale up from practice to client work.
Basic Lettering
Begin with single letters: practice consistent height, stroke contrast, and spacing between characters. Choose one font style—basic serif or sans-serif—then repeat words to build muscle memory for stroke direction and pressure changes.
Work on upward and downward strokes separately to nail stroke thickness. Pay attention to baseline alignment and kerning so words read clean at small sizes. Experiment with simple script strokes to learn flow, then return to block lettering to refine control.
Lettering practice improves hand rhythm, stencil placement accuracy, and the ability to scale designs to different body areas.
Best Body Parts to Practice Tattooing
Focus on surfaces that let you learn needle control, depth, and shading without risking a client’s skin. Use practice skins, fruit, and less visible body areas to build steady hands and confidence.
Recommended Products

RICH TEMPORARY TATTOO KIT - Contains rich tattoos pattern templates (126 designs),6 tattoo inks in 2 colors (black and brown),4 disposable gloves 1 pack of cleaning supplies,allowing you to easily create unique personalized tattoos

📦【Go Beyond Basics】191 diverse tattoo stencils (ranging from Artistic Vines to Minimalist Symbols) + exclusive white tattoo outline pen. This complete temporary tattoos kit includes 6 tattoo cones (2 Black, 2 Brown, 2 Dark Red) & Full Prep Kit (Cut-out Scissors, 10 Cotton Swabs, Clean Towel). Perfect for hena tattoos kit fans, parties, and family DIY!
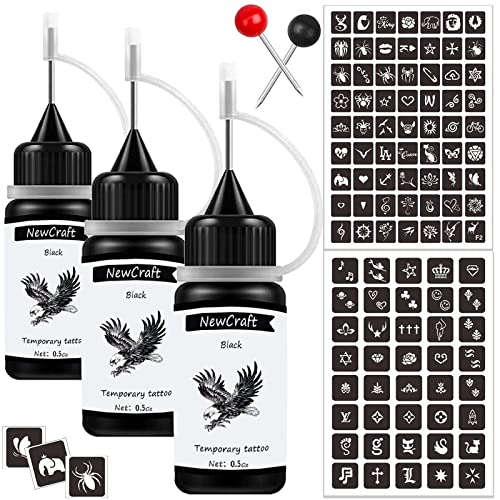
PACKAGE: There are 3 packs black temporary tattoo ink, 103 patterns tattoo stencils and one pin.
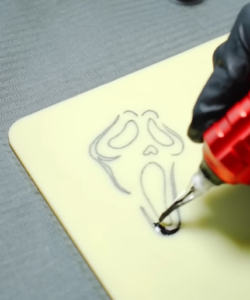
Practice on Synthetic Skin
Synthetic practice skin gives realistic resistance and texture so you can practice lining, shading, and needle depth safely. Choose silicone sheets marked for tattoo practice; thicker sheets mimic dermal layers and hold ink better for realistic feedback.
Work with flat pieces first to master consistent hand speed and needle angle. After that, move to slightly curved sections to simulate arms or calves.
Keep pieces secure on a clipboard or mannequin arm to prevent slippage. Clean and store reusable silicone properly; discard cheap disposable skins once they tear or show excessive pitting. Track each practice session—note settings, needle configuration, and what failed—to repeat improvements next time.
Tattooing Oranges and Fruit
Oranges and grapefruits offer a familiar, rounded surface and a rind density that approximates thin skin. Use them for practicing steady lines and short, repetitive shading strokes; the fruit’s curvature forces you to adjust hand position like you would on forearms or shoulders.
Start with single-needle lines, then do simple fill work and gradients. Expect more resistance than synthetic skin; pith and juice can interfere, so blot the area and keep towels handy.
Label each fruit with needle type and machine settings to compare results. Replace fruit frequently—bruised or overly soft rinds distort feedback and teach bad habits.
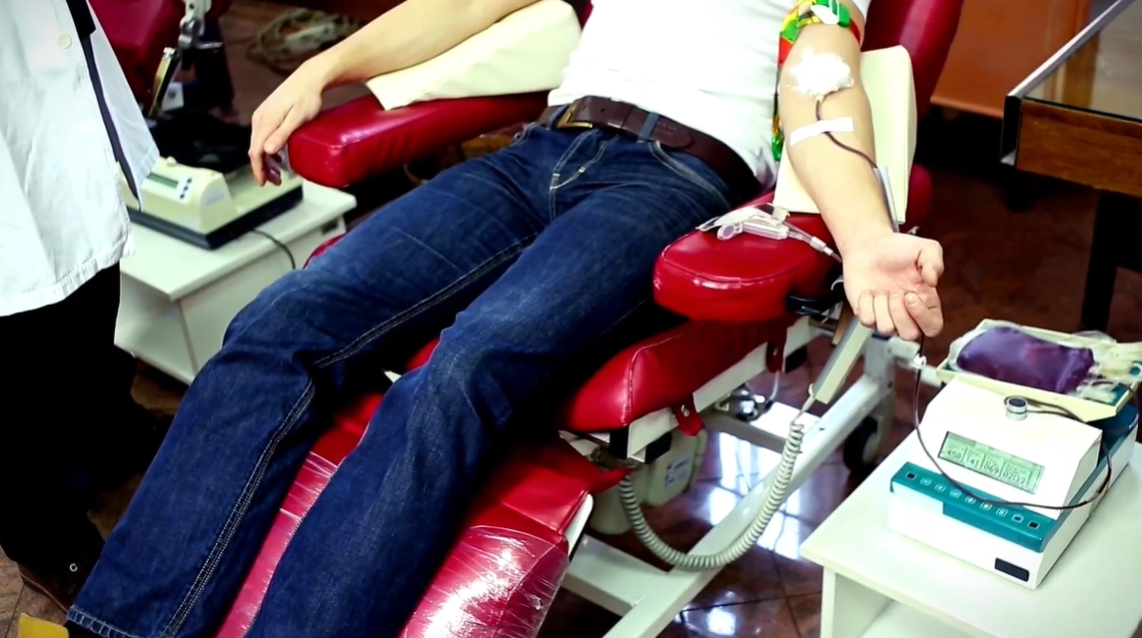
Less Visible Body Areas
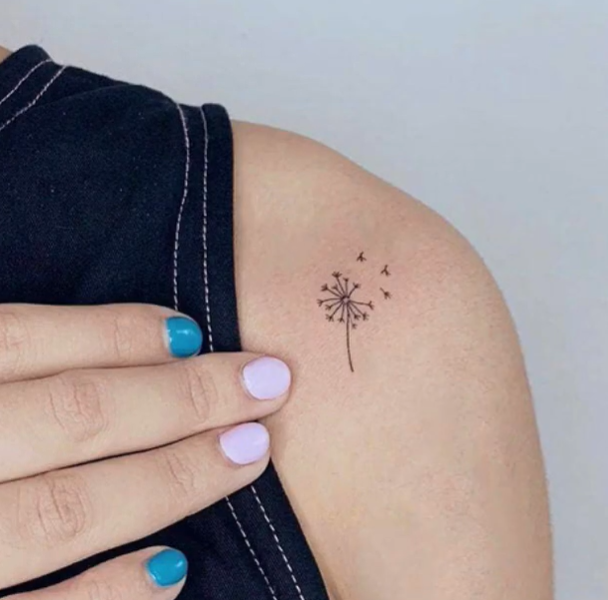
When you move to real people, choose concealed areas first to limit client concern and give you forgiving canvases. Upper hip, outer thigh, and the back of the upper arm hide minor mistakes and allow longer practice sessions without causing social discomfort.
These spots generally have thicker skin and less bony contour, so you can focus on technique rather than pain management or extreme curves. Ask volunteers to lie prone or in a stable position and use topical numbing only if you’re trained to do so.
Consent and hygiene remain critical: use single-use needles, proper barrier film, and follow local regulations. Start with small, simple designs and gradually increase complexity as your control improves.
Techniques for Tattoo Practice

Focus on control, consistent rhythm, and deliberate repetition. Work slowly on single elements until you can reproduce them cleanly under varying needle depths and speeds.
Recommended Products
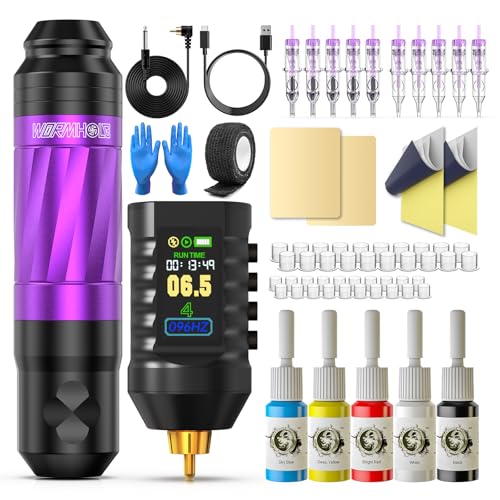
VALUE TATTOO KIT: This Wormhole tattoo practice gun kit comes with a total of 43pcs items, including a tattoo gun, a tattoo power supply, tattoo cartridge needles, tattoo...
Line Work Essentials
Practice straight lines, curves, and fine detail drills to build consistent needle control. Use practice skin or fruit and set machine speed low; aim for steady hand pressure and a smooth pull motion.
Work on these line types:
- Single pass lines: maintain constant depth and speed.
- Hairlines: use lighter pressure and a tighter grouping of strokes.
- Bold lines: slow your speed, increase needle grouping, and keep a steady arm to avoid wobble.
Check your work for even ink deposit, consistent width, and minimal blowouts. If lines feather or vary, adjust needle depth by 0.1–0.3 mm and slow the machine until you get uniform results. Repeat each drill until you can produce a clean row of ten identical lines.
Shading and Coloring Basics
Start with simple gradients and controlled dotwork to learn how ink settles at different speeds and depths. Use magnum shaders for smooth gradients and round shaders for stippling; practice stroking and circular motions for even fills.
Focus on:
- Gradient practice: transition from dark to light over a fixed distance, keeping needle depth constant.
- Circular shading: small overlapping circles with light passes build smooth blends.
- Packing color: slow, methodical passes with slightly deeper needle placement for saturated areas.
Monitor skin response on practice mediums—overworking causes patchy saturation. Experiment with needle grouping, machine speed, and hand angle, and document settings that give consistent smooth blends and full color coverage.
Common Mistakes When Practicing Tattoos
Practice sessions often fail because of two avoidable habits: damaging skin by going too deep or too long, and skipping proper hygiene or safety steps. Both lead to poor results and increase risk of infection, scarring, or machine damage.
Recommended Products
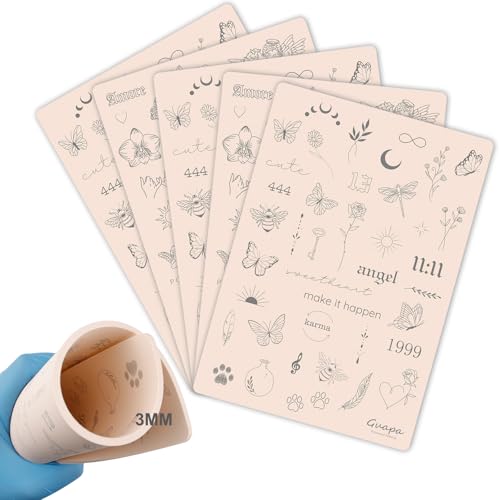
3MM Tiny Tattoo Practice skin Made from high-quality materials, it is closely mimic the texture and feel of real human skin. This gives you a realistic experience, allowing you to refine your skills before working on actual clients


Overworking the Skin
You overwork skin when you pass over the same area too many times, press too hard, or use an inappropriate needle depth. That causes excess trauma: heavy scabbing, ink blowout, widened lines, and longer healing. Aim for smooth, single-pass lines when possible and let the machine do the work instead of forcing pigment.
Control needle depth to the epidermis/upper dermis only. If you see continuous blood, excessive swelling, or ink spreading under the skin, stop and reassess settings and technique. Practice on synthetic skins, pigskins, or fruit first to refine pressure, angle, and speed before moving to live models.
Track session length. Limit back-to-back passes and allow short breaks to let the skin calm. Replace needles and cartridges regularly; dull points require more force and increase tissue damage.
Ignoring Hygiene and Safety
Failing to follow hygiene protocols risks infection for you and your client. Always use sterilized or single-use needles, clean work surfaces with hospital-grade disinfectant, and wear fresh gloves for each setup and client interaction.
Use proper PPE: face mask, eye protection when needed, and gloves changed anytime you touch non-sterile surfaces. Dispose of sharps in approved containers immediately after use. Autoclave reusable tools and keep a visible log of sterilization cycles.
Don’t skip client screening and aftercare instructions. Ask about allergies, blood thinners, skin conditions, and medications. Provide clear written aftercare and follow-up checks so minor issues don’t become serious.
Advancing Your Tattoo Practice
Focus on building precision, control, and visual judgment by tackling more difficult compositions and experimenting with new stylistic rules. Target specific technical gaps—line steadiness, layer sequencing, shading transitions—and track measurable improvements.
Recommended Products

▶ Henna Tattoo Kit: 16 sheets tattoo stencils. airbrush tattoo stencils suitable for tattoo lovers. Experience the effects of tattooing without the pain of tattooing.

INCREDIBLE VALUE – 524 Unique Designs: This henna tattoo kit includes 20 stencil sheets with 524 patterns, featuring butterflies, florals, symbols, lettering, totems, and Egyptian-inspired designs. These henna stencils let you mix, match, and layer for custom henna temporary tattoos on hands, arms, and body. A refillable pen with a soft nylon tip is included for precise lines and varied strokes (pen does not include ink)

【 575+ Fun Assorted Tattoo Stencils 】-The ChurlChurl tattoo stencils collection includes 575 high quality stencils with multiple themes. enjoy cute trendy tattoo stencil designs like butterflies, words, flowers, symbols, totem, Egypt style patterns and more.
Testing Complex Designs
Choose multi-element pieces that force you to plan sequencing and spacing, such as a realistic skull overlapping florals with a banner and script. Break the design into layers: outline, base shading, texture, highlights. Practice the outline first on synthetic skin to lock in steady line speed and needle angle. Then repeat the piece three times, altering one variable each run (needle grouping, machine voltage, or stroke depth) to see how each change affects texture and saturation.
Use reference photos at full size and grid them for accurate placement. Time each pass and note problems like blowouts, uneven ink deposit, or fuzzy edges. Keep short notes after every session so you can correct one issue at a time on the next attempt.
Exploring Different Tattoo Styles
Pick two contrasting styles to study in depth—try fine-line blackwork and bold neo-traditional color—to expand your hand vocabulary. For fine line, concentrate on consistent, single-pass lines and hair-fine detail; practice on pigskin or high-quality practice skin until your lines remain crisp at 1–1.5 mm widths. For neo-traditional color, rehearse solid fills, smooth whip-shading, and controlled color blending using multiple passes and gradual dilution steps.
Create small flash sheets that isolate the core moves of each style: one sheet of micro florals for blackwork, one sheet of bold roses and anchors for neo-traditional. Compare results side-by-side to identify which motions or machine settings need adjustment. Rotate styles during practice weeks to prevent technique stagnation and to build adaptability.
Building a Tattoo Practice Portfolio
Create a clear record of your technical growth and curate pieces that show consistent strengths. Focus on healed photos, varied subject matter, and honest sequencing that proves you can learn and improve.
Recommended Products

Perfect Package & Size: Includes 50 individually wrapped tattoo practice skins, each Tattoo Skin Practice 7.5" x 5.7" and 1.0mm thick—providing ample space for practice. Ideal for beginners and tattoo studios to practice detailed designs.

📏1.3mm Professional Grade - 30 sheets of 1mm thick synthetic skin with dermis-like texture, certified by tattoo artists for real needle feedback and ink absorption. Ideal for beginners to avoid mistakes on real clients.

Documenting Your Progress
Take high-quality photos of every practice tattoo and every skin-stencil test. Use a neutral background, consistent lighting, and include a ruler or coin for scale. Save RAW or high-res JPEGs and back them up in dated folders so you can trace improvements by month.
Photograph fresh and healed stages when possible — healed images matter more to mentors. Note machine settings, needle configuration, ink brands, skin type, and client or model notes (aftercare, movement issues). Maintain a simple spreadsheet with date, location on body, style, and rating for line work, shading, and color saturation. That record helps you spot patterns and decide what to practice next.
Selecting Your Best Work
Choose 10–20 pieces that show technical control, composition, and a consistent aesthetic. Prioritize healed tattoos, clean lines, smooth gradients, and correct placement over trendy subjects. If you specialize, include 6–8 strong examples of that style plus a few pieces demonstrating range.
Present images in a logical order: strongest first, then grouped by style or size. For each image, add a one-line caption with date, skin tone, needle setup, and any corrections you made after feedback. Remove pieces that look inconsistent with your current skill level; honesty builds trust with mentors and clients.